It’s been a long time coming.
We dated our first day of work on the cottage: August 12, 2011.
1,310 days.
Sometimes there were days weeks months when nothing happened except, you know, Life. And death. And taxes.
There was is so much work to do on this small humble cottage. New windows. New roof. The bathroom still isn’t done. Each room we do needs to be rewired. The back porch and the garage and the driveway need some TLC. And Mr. H.C.’s workshop is still a disaster area. But…
…there is so much that Has. Been. Done. And last month I promised you pictures. So here are some Befores, Durings, and Afters:
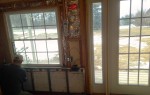
Mud Room/Entry
We left the mudroom a few posts ago with the floor finished and hardiebacker board under the window awaiting tile of some sort. After a few days of waffling, we bit the bullet and went to a tile store. We had in mind black slate, but we ended up with black travertine subway tile. It looks gorgeous, but it doesn’t photograph well, so you’ll just have to take my word for it. We got the wood stove hooked up just in time for Frigid February, and Henry the cat found a new favorite spot to snooze the month away. We, on the other hand, worked the month away, delighted to have the house warmed by a toasty wood stove. All three of us fought over the rocking chair in the evening.


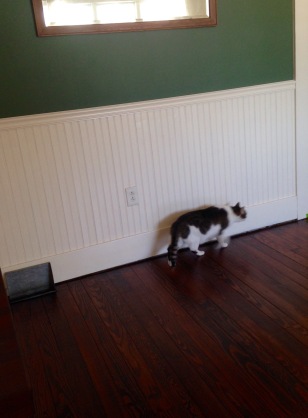
Living/Dining Room floor
Mr. H.C. spent the better part of two weeks taking up boards from the old floor, trimming the ends, and replacing them like a jig saw puzzle. In the end we only had to buy four new boards to put against the far wall. They stained a tiny bit differently — but only we would notice.


For three days we had to go outside to get to the bedroom, and this was during the nationwide frigid temperatures of February. Henry the cat was most unhappy as he was imprisoned in the basement. Here he is tiptoeing against the wall on his first foray upstairs:
Sixth Wall in the Living Room
The wall going into the bathroom had to be ripped out. We wanted a pocket door to make more space in the bathroom, so the doorway had to be moved to the center of the wall. A heating vent also had to be moved. The last wall is still in progress, and the door is awaiting painting. We reused the same door and Mr. H.C. bought the pocket door kit at a Habitat for Humanity Restore for about half-price.


Living Room Bookshelves:
We knew we wanted bookshelves along the back wall and over the door; we just weren’t sure how they would take shape. But with an inspiration picture, Mr. H. C. pulled it off again. If you ask me, these are the highlight of the room.


Moving Day
Saturday March 7th dawned cold and sunny. We had been chipping away ice and snow for the last day and a half. The truck was picked up, our friends were cheerful, and the heavy leather couch got moved without any damage (to the couch or human backs). The city mice were finally moving to the country…


And we were so excited to get here, that we didn’t get a single photo of Pedro and Pete, our moving helpers on the country end.
And finally…
In decorator speak, it’s called the final reveal… But I look at it and think, “Wow, is this really the cottage living room? Where there were once dead mice in the walls? And a terrible smell in the floor?”


Life is Good.


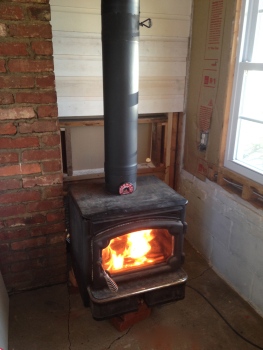 Mr. H.C. was just itching to get the wood stove hooked up into that chimney, but the contractor guy in him couldn’t bear to pay someone else big bucks for something he thought he could do. So we ordered chimney liners online from
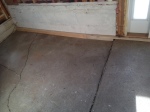
 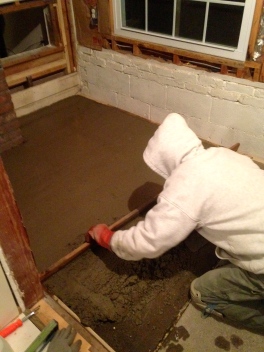 We had planned to put down concrete over concrete to level the floor and then some concrete board over the concrete to keep any cracks from showing up in a couple of years. But the cement board idea didn’t work, so we just laid a new layer of concrete. The laying/grouting/sealing of the tile did not go smoothly; I won’t go into details, but it certainly looks beautiful to us. (Did I mention we chose to do this project during the coldest week of the winter?)
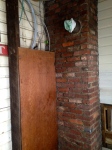
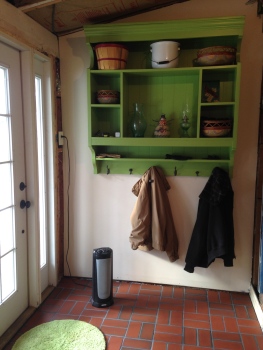 One wall is finished with an old pine hutch top that has been repainted and repurposed into a mudroom staple — shelves and hooks for jackets. I painted it Blooming Grove green to bring the kitchen color out into the adjoining mudroom. The walls behind the wood stove are now covered in metal studs and Hardiebacker board (fire-resistant for the walls next to the wood stove) and some sort of tile will go over it. Soapstone is the material of choice, but $$$ matter. We’ve gone shopping at the big box stores and found nothing of interest, and we’ve had a long dry spell at our favorite Restores.

