The kitchen cabinets are looking creamy and shiny — the luscious color of steamed milk. They are ‘curing’ in the garage bedroom, and before we leave them for awhile, I have a confession to make : I spent as much on the new hardware for them as we spent on the cabinets themselves.

The bottom two handles are from an antique cupboard that we bought from the E.N. Miller Antique Mall (***** 5 stars) in Verona last year. It is the bottom to an old schoolhouse cupboard that held art supplies. We will be using it as the island in the kitchen. It has great charm, but could be considered by some to be in rough shape. More on its transformation later…
The handles are wonderful — old, heavy, off-set pulls — and I wanted those exact handles for the other cabinets. I found them online at VanDyke Restorers. I’ve blanked out how much they were individually, but the final total was about $280. (I missed out on the sale price by “thinking” about whether I really wanted to spend that much. When I made the decision to buy — a day later –they were two dollars more!)
I confess to having measured the holes on the cabinets. And I ordered 3″ handles. They don’t fit. The holes are actually 2 7/8″ apart. Stupid me, I assumed that handles were uniform on the half inch. I guess that is modern cabinetry. Carpenter husband assures me it’s only a minor glitch, but the cabinets are painted, and I’m ready to dress them up with their finery, but now we have to drill new holes. Patience is being taught here…

Painted cabinets awaiting their handles.
The next step is the lighting and that means rewiring (not MY job) before the ceiling can be installed. This is what Michael reads before bed:
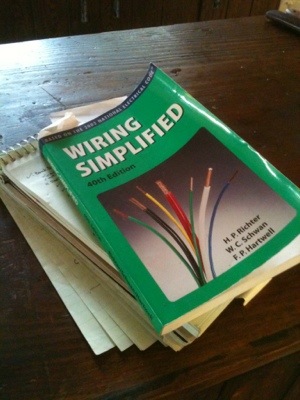
Bedtime reading — It puts him right to sleep!
On to the fun stuff — the lights. Michael hung them temporarily so we could visualize and also see if the kitchen was bright enough. (Yes, at our age we like lots of light — no squiggly bulbs here!)

These are just up temporarily, so ignore extensions cords hanging from them! (We are visual learners…)
The light in the center is over the island; the ones that are pendants are on either side–over the sink and over the pass-through. (I think we will lower them a couple of inches.) I realize that’s backwards and most people have hanging lights over the island, but we tried it and like this better. It’s more symmetrical, and I like symmetry! A LOT! When I see the asymmetrical, I want to go fix it.
And now, back to the island cabinet…Michael spent many hours on these beautiful doors:
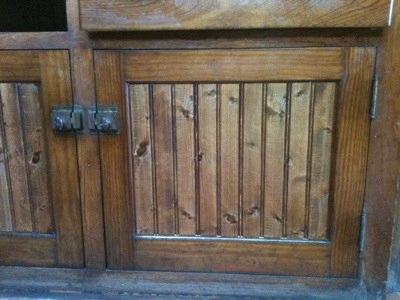
The center of the doors was originally veneer. It was warping and buckling so I scraped it off, and we decided to put thin wainscot on because that’s what is on the inside of the cupboard. They looked like this:

Before…
He painstakingly beveled all the edges and then had to get just the right stain mix to match hundred year old wood.


The mixologist at work…
We also spent time researching what kind of finish was on the cabinet and how to clean it. The librarian did the research, the woodworker did the experimenting. (What a team!) We determined it was lacquer and cleaned it with a mixture of linseed oil and turpentine. They were detailed instructions and if you want the full article on cleaning and restoring shellac, lacquer, or varnish you can find it here. http://www.ca.uky.edu/hes/fcs/FACTSHTS/HF-LRA.053.PDF We still aren’t finished with the cupboard, but it looks lots better already, and the doors look like they were original.

With the temperature hitting 100 degrees, we were glad to work inside in air conditioned comfort.
How amazing that we have air conditioning in our humble cottage when our walls look like this:

and this:

It looks like someone took a shotgun to it, but it was really just Clara’s picture wall. It was covered with photographs. She must have moved them around a lot…
(Sigh…)
Patience is being taught here…
