The absolute, very last ever post on the mudroom…maybe

Why?

Because it is finally finished. And I have to say this final bit was all Mr. H.C. The only share I had in this last wall was painting one coat of paint on the door.

There won’t be too many words about this, because words cannot describe how completely and utterly finished it looks.

Unfortunately photos can’t do it justice either. Because it is all painted in Sherwin Williams’ lovely creamy white color — Steamed Milk. The same color as the kitchen walls. The same color as the dining room walls. The same color as the living room walls. The same color as the ceiling in all those rooms as well. Yes, we like creamy white walls. And ceilings.

In my humble non-decorator-just-average-person opinion, creamy white walls make a humble cottage look bigger, lighter and brighter, and just all-around more cheerful. And anyone who saw the cottage before, with its orange walls and wallpaper and 70s dark paneling would agree.

So without further ado, here are some befores, durings, and afters of our finally-finished-after-five-years mudroom entry to Apple Hill Cottage. (Trumpet sounds here…)

One can see that it is so new, there isn’t even any art on the walls.

This gallery below shows the progression of the outside wall of the mudroom — from the initial window, cedar shake walls, and plastic ceiling — to what it looks like now:

The next gallery of photos shows the progression of the second wall:

The floor has been done for a couple of years, but it still merits a before and after photo shoot:

The finishing of this room took so long because an exterior roof was necessary before the interior ceiling could be installed. Since the roof was finished this past summer, this winter we were able to proceed with the ceiling:

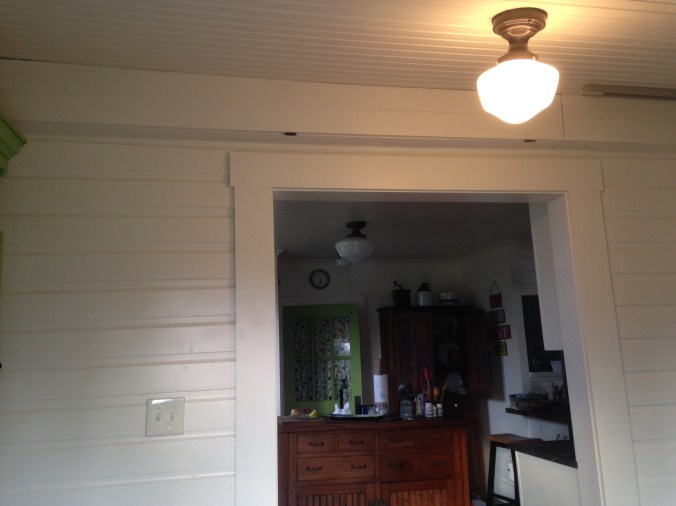
The last wall to be finished (February/March, 2017) was the wall with the most issues. There is an electric panel two feet from the wood stove; there were wires traveling the whole length of the wall that hooked into the electric panel; and this wall was also the orginal entry into the kitchen before the mudroom was enclosed and was just a porch. When we took off the cedar shakes, the wall was down to its original siding and it wasn’t pretty:

These photos below show the electric panel side of the doorway:

The sliding door that covers the electric panel is made from concrete board and trimmed with wood grain concrete board so it mimics the other interior doors in the cottage, but it is safe for being next to the wood stove. It hangs from the ceiling with pocket door hardware.

One of the best things about having the mudroom finished is that now the doorway into the kitchen is finished as well. In the last post on the mudroom,  I showed you the photo on the left. Now the far right is the finished picture.

Five rooms down, two to go. Three if you count the back porch; four if you count the laundry room.

But who’s counting?

79. The Corner Dining Room

I know, I know, you’ve seen beautiful pictures of the kitchen, beautiful pictures of the bedroom — you must think we’re about done by now, right?

Today it is back to ugly pictures again, folks.

In between the kitchen and the bedroom is the corner dining room. Well, the living room is there somewhere too, but we’re skipping that for now…

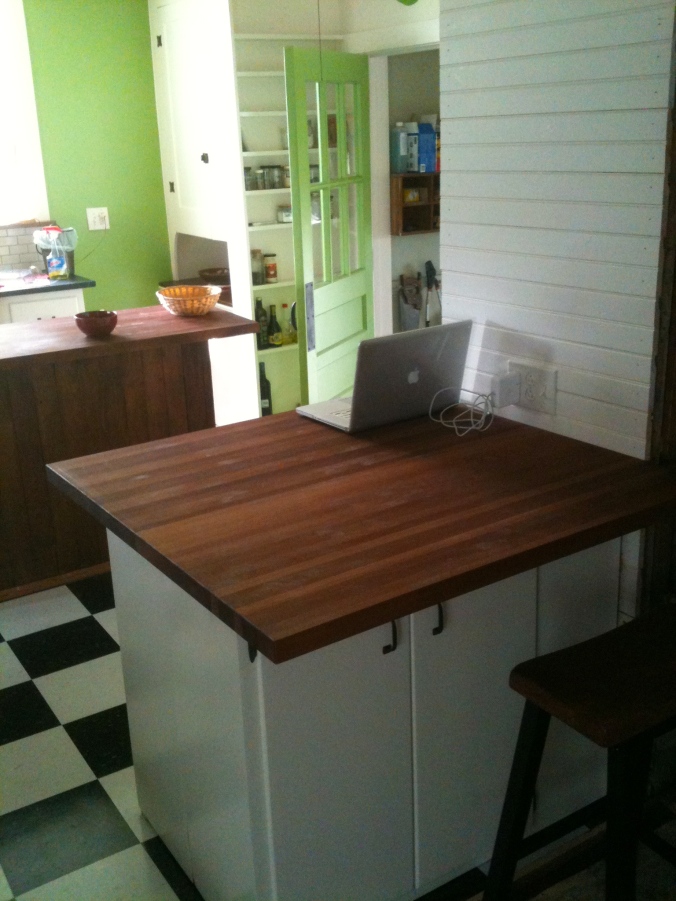
Sapele butcher block counter top

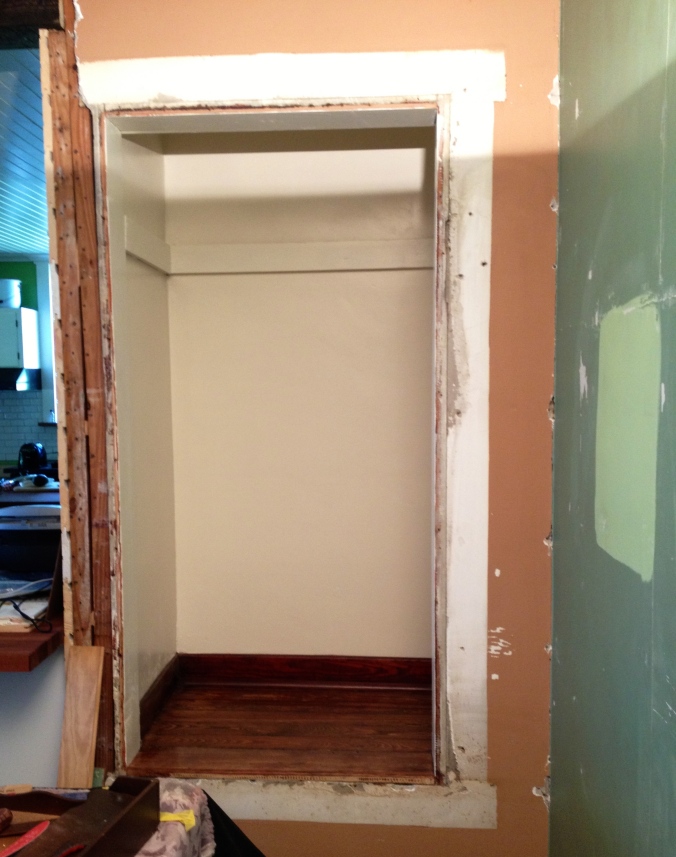
Right next to this lovely peninsula is this not-so-lovely little closet.Dining room closet
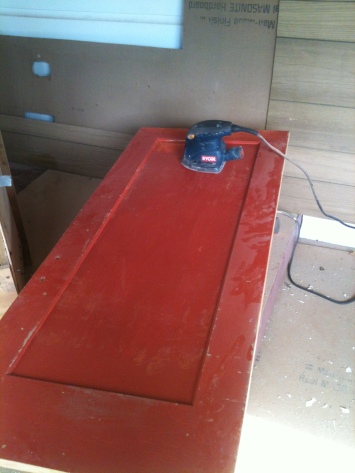
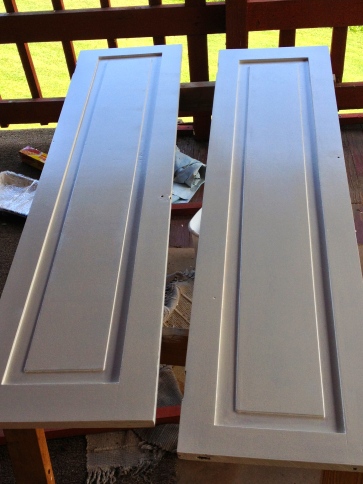
Actually, I’ve been working on it, and it is much better than it was. Inside. The doors to this little closet will be charming when they are finished. They were in my sanding room for awhile…Of course, they were painted orange.

I couldn't get all the orange paint sanded off, so I did the best I could and then just primed the heck out of them

I couldn’t get all the orange paint sanded off, so I did the best I could and then just primed the heck out of them

Dining room closet doors painted with Sherwin Williams Steamed Milk Satin

Here they are painted with Sherwin Williams Steamed Milk.

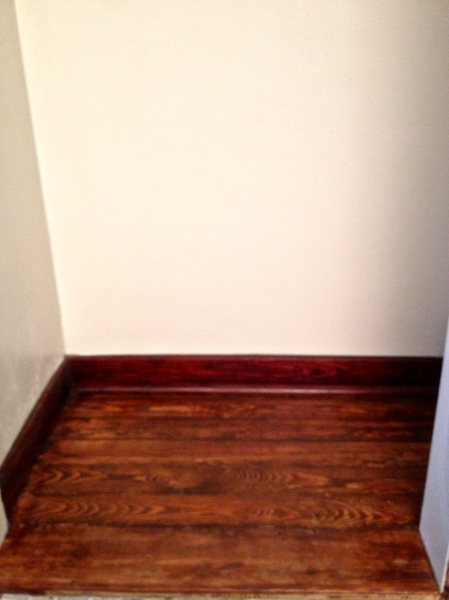
Inside the closet the first floorboard is a white pine plank; the rest of the boards are yellow pine flooring boards. It took MUCH effort to get the two types of wood to stain the same. The front plank has so much stain painted on it, that it may never dry..


Notice the good job of matching two different types of wood -- white pine and yellow pine.

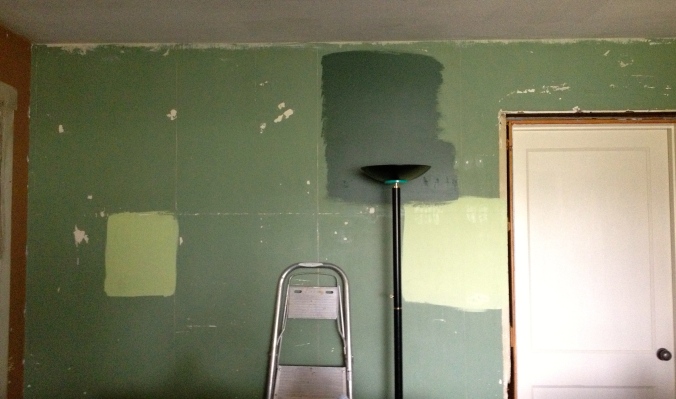
I’ve been trying out green samples on the dining room wall. Very light, sort of light, and as dark as I want to go. None of them seemed right.

Greens on the Dining Room wall

Still life with lamp and ladder…

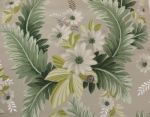
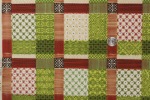
Then one evening while I was poking around on Retrorenovation.com I found the answer! Vintage Wallpaper! All colors of greens in one wall, which is just what I was trying to figure out how I could do! It’s perfect. I hesitantly brought it up to Mr. H.C. who immediately said he was game. (That was before he saw the price! :-) ) Now if I can only decide…I’ve got two samples coming from Hannah’s Treasures. I’ve put three in this blog post — comments please! Which ones do you like?

e908badabf3f114e94393a4bcdfc1857b51306255818cce6023ebd6ae950248f

Vintage wallpaper from Hannah's Treasures.

Vintage wallpaper from Hannah’s Treasures.


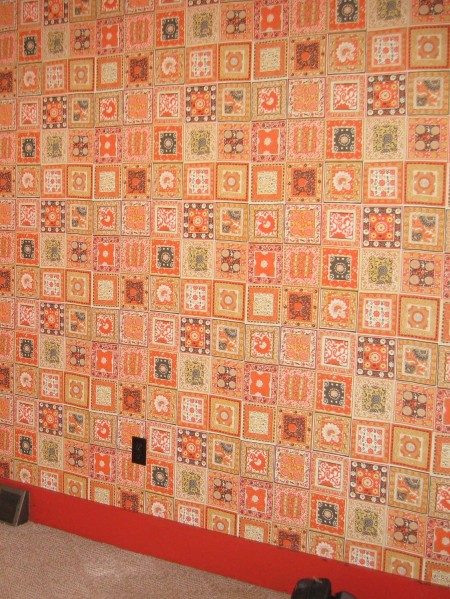
I didn’t order a sample for the bold plaid one on the right, because as soon as Mr. H.C. saw that one, he started shaking his head. I think he just doesn’t like it because it reminds him of the wallpaper he put up (on the same wall) for his mom, Clara in the seventies. (See post 1. The Story of Apple Hill Cottage.) Here it is:

This is the wallpaper that covered the door...

This wallpaper covered the door beside it as well… I think it is fitting that this wall be covered in wallpaper again!

Mr. H.C. assures me that it isn’t the wallpaper it reminds him of, it was a pair of his Dad’s golf pants… Okay, well I might give him that; I think my dad had a pair too.

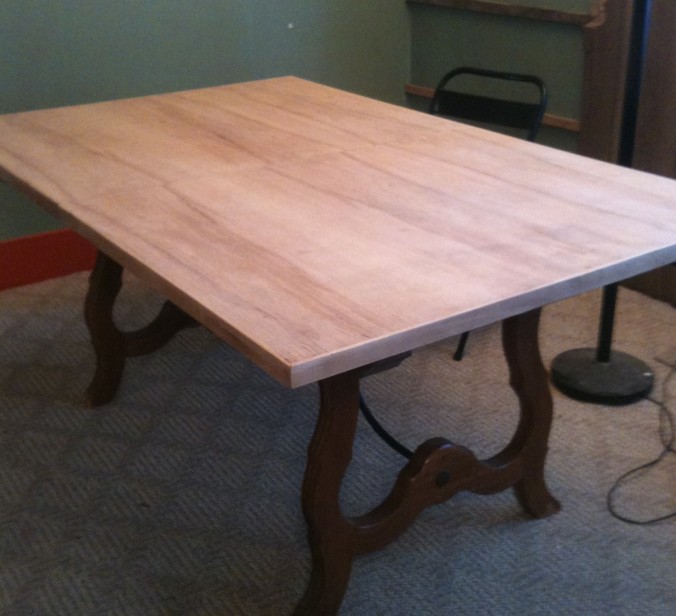
I could go on… and on… about the floor, and the trim, but I won’t. I WILL show you just one more photo of the dining room table treasure though. We found it ages ago at a ReStore for $35, and it has been sitting in the dining room under three layers of plastic and tarps to protect it from all the junk on top of it.

harvest table
The top will be stained a darker, rich wood color. I’ve been thinking all along to paint the legs black, but I think I’ve changed my mind, and I’m going to go with the dark green (Benjamin Moore Peale Green) that is on the wall. And a couple of chairs painted that same dark green? What do you think? That’s at least two questions to comment on!

So, are we wallpaper lovers, or not?

78. random thoughts on painting wood (from a carpenter’s wife…)

I’ve been painting lots of wood lately. Doors, cabinets, woodwork… I love paint. I love color. But I also love wood.

Paint and color and wood can co-exist, but finding that perfect balance is difficult. Rooms with too much wood need color for drama; rooms with too much color scream out for wood to give rest to the eyes. It’s that perfect balance that makes us all sigh and sit down in comfort.

Mr. H.C., the carpenter, hates to paint wood. “When wood is painted, it’s painted,” he says. “And only a huge effort can get it back to its original state, and even then, it might not look good.” (For a very funny post on men and painting wood, read The Decorologist’s post, Why Men Fear Painting Wood)

When I was about fifteen, my mom and dad undertook the making over of the basement in our fifties ranch house. They were on a shoestring budget, but they wanted a room where their teenaged daughters could hang out with their friends. It was a gigantic room — just putting carpet on the floor, a dropped ceiling, a big comfy couch, and room dividers at the ends probably put them over-budget. So Mom was gathering furniture from every attic and garage that she could find. Two of her scores were pretty little washstands. She painted one late-sixties orange. As she was preparing to paint the other (late sixties chartreuse) I stepped in. In my fifteen-year-old wisdom I said, “Mom, why are you painting that pretty washstand? You should never paint wood furniture.”

She gathered together all her parental wisdom and said, “When you’re older, you’ll understand.”

In the infinite circle of life, twenty-five years after she painted it chartreuse, I inherited this charming little washstand. It was still chartreuse. I took it to the local stripper and told him I would pay him well if he could take that paint off for me. A few days later he called me back. “Was this painted in the late sixties?” he asked. “And then maybe antiqued?”
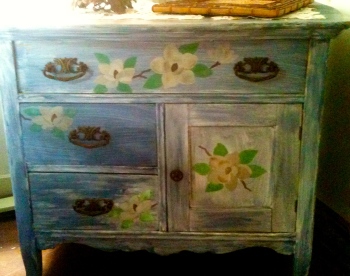
pretty washstand painted in nineties blue stenciled with nineties flowersIt absolutely was.

“Yeah,” he said. “That stuff just can’t be stripped off.”  He sanded the door and then gave up. His advice? “Just paint it. It’s only poplar.” So I painted it early-nineties blue and stenciled it with early-nineties flower stencils. And now, twenty years later, it is relegated to holding craft supplies in my upstairs craft room that is not open to the public.

So many pieces of beautiful old furniture ruined.

And so I learned — Don’t paint it, if it can never be reclaimed.

Truth be told, my mom paid her dues for painting all that wood furniture. (She also painted a carved wooden love seat and several oak pressed-back chairs orange, as well as two beautiful rattan easy chairs chartreuse!) When the trend for country furniture started in the late seventies, she and my dad were early adopters. (The first Country Living magazine was published in 1978  — probably a direct result of all that bad furniture painting and colors of the sixties and early seventies!) They bought beautiful old furniture at auctions and sales, stripped it, and refinished it with natural oil finishes. When she found this  primitive hutch in Uncle Judd’s basement, it was painted a lovely shade of pink and was storage for paint supplies  — a fitting tribute to what often happens to painted furniture…
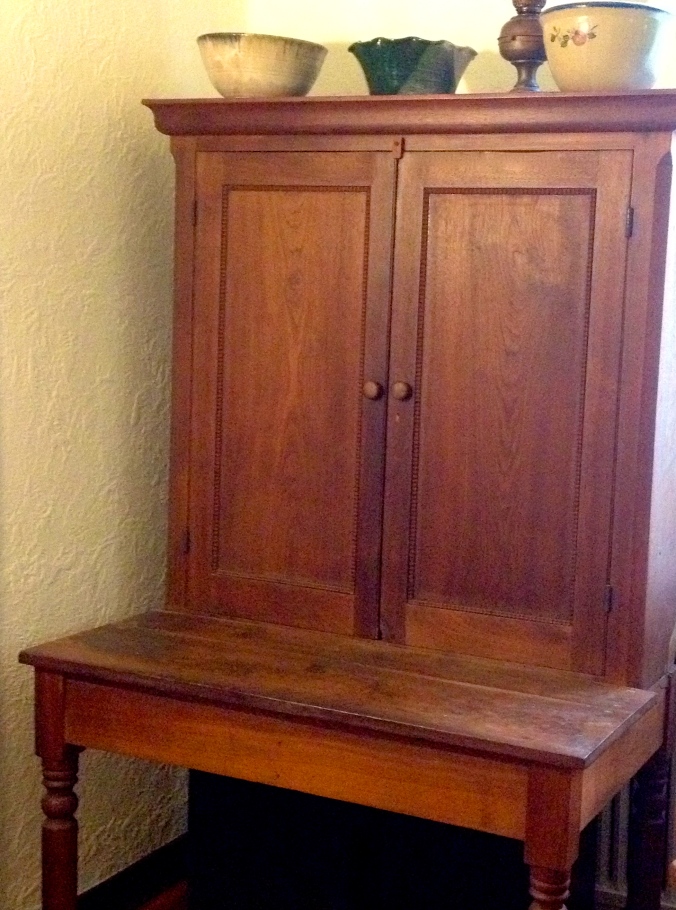
primitive walnut hutch

Aunt Sara and Uncle Judd were astonished when my mom picked that particular pink piece of furniture. Mom dragged it home (it comes apart in two pieces) and she and Dad lovingly restored it. Mr. H.C. thinks it is walnut. It is a bit quirky, but I love the fact that it is a one-of-a-kind antique, passed down through family, that many hands have touched it, restored it, made it their own. I love the circle that life is.

I understand wanting to make a piece of furniture, or a house, your own — individualizing it. That’s what we are doing with Apple Hill Cottage, after all. DIY is good. But what happens when the DIY goes bad? Let’s face it, that little washstand  I painted and stenciled? I didn’t do such a good job of it. AND fashions change. The turquoise of today will be tomorrow’s outdated color. The white cabinets of today will be dated in ten years.
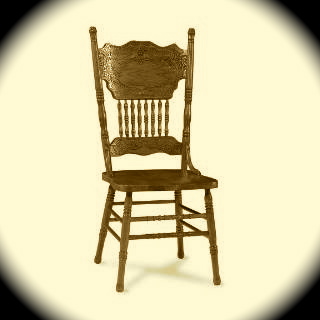
This is the classic pressed-back chair, and very similar to the one I painted glossy forest green...

This is the classic pressed-back chair, and very similar to the one I painted glossy forest green…

Recently I read a post about “reviving an antique Windsor chair” by painting it blue. I laughed to myself. I did that once. I painted a lovely oak pressed-back chair glossy forest green; BUT I only painted it because it had already been painted orange. (Yes, by my mom — it sat right next to that orange washstand in our basement.) And it was never going back to its beautiful oak original beginnings.

All those rungs? All that carving? All that glossy paint? I repeat:  Don’t paint it, if it can never be reclaimed.

…Which translates into the following rules suggestions for painting wood:

  • Do not paint any family heirlooms.
  • Do not paint anything that might be valuable the way it is.
  • Do not paint anything that has carving or curves or moulding that would be hard to sand back to its original condition.
  • Do not spend any more than $35 on any piece of furniture you are planning to paint. (Well, maybe $50 if you live in a city…)
  • Try to find pine furniture (or poplar) for painting. Or better yet, find something that has already been painted.
  • Paint only furniture that you are willing to refinish or throw away, when your mind (or the fashion) changes.

And our minds change frequently, don’t they?

With all that said, I’m looking for a few cheap dining room chairs to paint….

This lovely painted pressed back chair is from the Irish Lady’s Blog. If you live in Texas, you could drop by her shop and purchase this pretty chair. It looks lots better than the one I painted glossy green (but that’s because glossy forest green is currently out of fashion…)

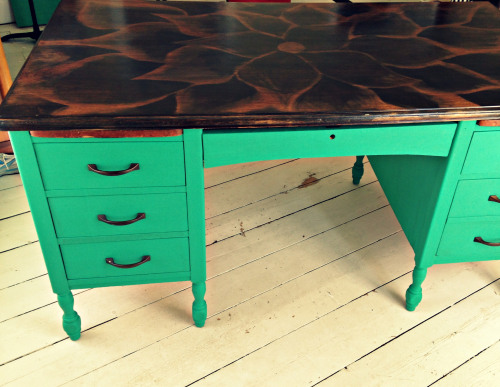
Emerald green, however, was Pantone‘s color of the year this year. And Tricia at the Domestic Fringe just posted this DIY painted desk. She found the desk set out for the garbage — in which case, it is totally OK to paint. Especially when you can do this to the top:

Desk1

To find directions on how to do something like this to the top of YOUR old desk, see the post on DIY: Trash to Treasure desk renovation..

I have an ugly wood desk in my not-open-to-the-public craft room upstairs. I would love to have that flower top on it… And I could paint the bottom a pretty, rust-colored orange… oh, wait. I can’t paint it orange! It belongs to Mr. H.C., the carpenter who hates to paint wood. But I do have a washstand that could stand to be painted…Maybe orange, huh, Mom?