The absolute, very last ever post on the mudroom…maybe

Why?

Because it is finally finished. And I have to say this final bit was all Mr. H.C. The only share I had in this last wall was painting one coat of paint on the door.

There won’t be too many words about this, because words cannot describe how completely and utterly finished it looks.

Unfortunately photos can’t do it justice either. Because it is all painted in Sherwin Williams’ lovely creamy white color — Steamed Milk. The same color as the kitchen walls. The same color as the dining room walls. The same color as the living room walls. The same color as the ceiling in all those rooms as well. Yes, we like creamy white walls. And ceilings.

In my humble non-decorator-just-average-person opinion, creamy white walls make a humble cottage look bigger, lighter and brighter, and just all-around more cheerful. And anyone who saw the cottage before, with its orange walls and wallpaper and 70s dark paneling would agree.

So without further ado, here are some befores, durings, and afters of our finally-finished-after-five-years mudroom entry to Apple Hill Cottage. (Trumpet sounds here…)

One can see that it is so new, there isn’t even any art on the walls.

This gallery below shows the progression of the outside wall of the mudroom — from the initial window, cedar shake walls, and plastic ceiling — to what it looks like now:

The next gallery of photos shows the progression of the second wall:

The floor has been done for a couple of years, but it still merits a before and after photo shoot:

The finishing of this room took so long because an exterior roof was necessary before the interior ceiling could be installed. Since the roof was finished this past summer, this winter we were able to proceed with the ceiling:

The last wall to be finished (February/March, 2017) was the wall with the most issues. There is an electric panel two feet from the wood stove; there were wires traveling the whole length of the wall that hooked into the electric panel; and this wall was also the orginal entry into the kitchen before the mudroom was enclosed and was just a porch. When we took off the cedar shakes, the wall was down to its original siding and it wasn’t pretty:

These photos below show the electric panel side of the doorway:

The sliding door that covers the electric panel is made from concrete board and trimmed with wood grain concrete board so it mimics the other interior doors in the cottage, but it is safe for being next to the wood stove. It hangs from the ceiling with pocket door hardware.

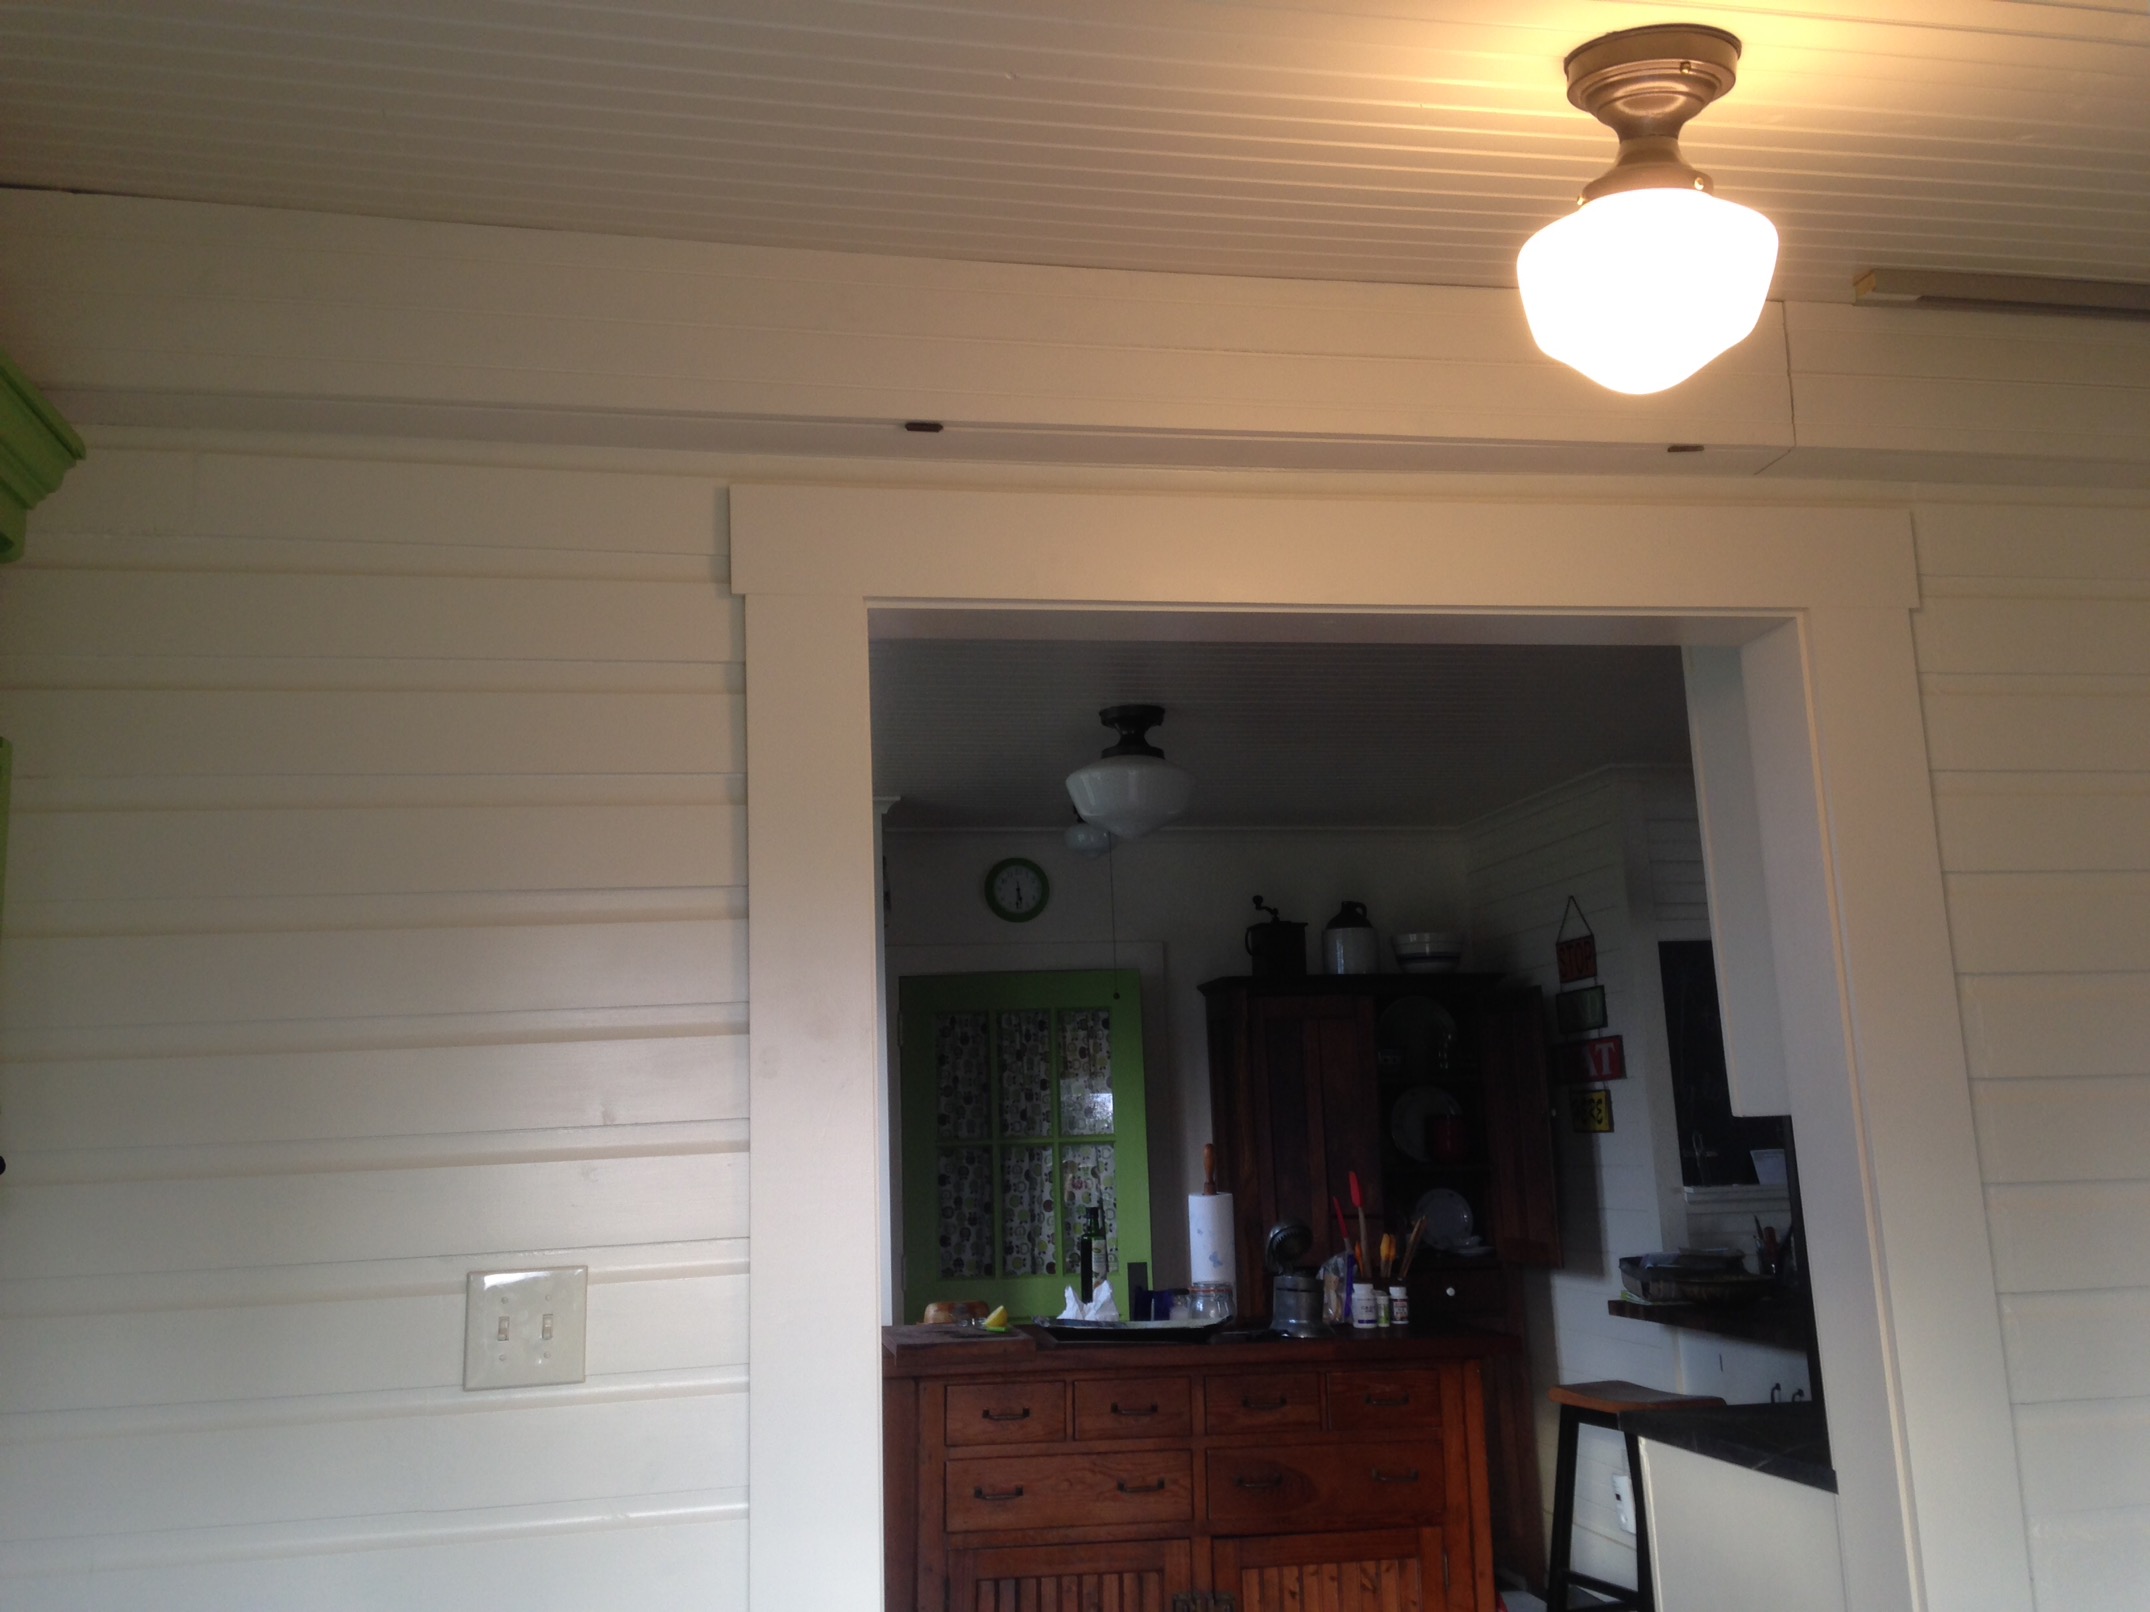
One of the best things about having the mudroom finished is that now the doorway into the kitchen is finished as well. In the last post on the mudroom,  I showed you the photo on the left. Now the far right is the finished picture.

Five rooms down, two to go. Three if you count the back porch; four if you count the laundry room.

But who’s counting?

Iced Tea on the Back Porch

This is the third August that has come around and I haven’t had to think about school. Instead of thinking on lesson plans and books and remembering kids’ names, I’m thinking on canning and freezing the garden’s produce, and sitting on the back porch with a glass of mint iced tea and enjoying these soon-to-be-glorious days of September.

Last summer we worked on the porch ceiling because the wood needed to be fixed before we could even think of putting a roof on top of it. We worked on it; I just didn’t document it, because, well, I wanted to have some nice photos to post about our wonderful, rustic back porch, just right for summer and mint iced tea.

Yeah, pride is a terrible sin…

I’ve never shied away from posting horrible photos of the cottage. You, dear reader, have seen pictures of holes in the floor, ugly plaster, dead mice in the walls, ancient electric wires, and rotten insulation. I believe in truth-in-blog-posting.

Mostly.

I’ve never shown you a picture of the back of the cottage.

The truth is, from the back it looks like an Appalachian Mountain Shack. This fact was brought home to me when we had to take photographs of the cottage from every angle for our insurance company. They didn’t want any pictures of the inside. The Beautiful Rooms that we’ve finished? Nope. They wanted photos of the outside. back of cottageOkay, so you can tell this was taken in the early spring. Actually, early spring, Last Year. Since then we have replaced, scraped, and painted some of the clapboard siding and fixed up the other stuff a little, but yes it’s still ugly. Although it does give you an idea of the scope of our problems. The mismatched windows belong to the basement workshop — not a high priority for remodeling; and what will we ever do with the cave there under the steps? Right now it’s a good place for garden tools…

We started with Mr. H.C.’s hard and fast rule — work from the top down. Replace the rotted boards on the roof. Put up new plywood and new drip edge. Take out unnecessary boards. Get rid of the spiders and wasps. Paint. And oh yes, put a new roof on the whole cottage.

These views made us consider a skylight or two, but that was rejected in favor of expediency and cost. Paint is cheaper. The new color is Benjamin Moore’s Segovia Red.

My sanding workshop around the back corner of the porch was in use again, as a door-stripping workshop. Lovely old French patio doors will eventually replace this ugly old metal door. It will be a great day when that old door goes on the trash heap.

But the work stopped when we discovered lead paint on the patio doors.  I don’t need any more dead brain cells, you know?

Now what was I saying?

So the porch is painted, the roof is fixed, but that ugly storm door is still there. So are Sliding Glass Doors # 5. And so is the ugly thirty-year-old indoor-outdoor carpet. Sigh. And the back of the cottage remains shack-like, with the top story painted and re-roofed, and the bottom floor ugly. (But the front is looking pretty good….)

At least no one sees the back of the cottage but the deer and the groundhogs. And they don’t care. And despite the unappealing nature of the photo above, these are views looking out from that ugly porch:

The skies and the birds and the green more than make up for the shabby carpet and the old screen door. And so does iced tea on the back porch while other people are in school…

143. All the Gray Is Gone…

Just when I think I’m going to post about the new back porch that is finished just in time for September (it’s not);

Or the new door that we’ve found to replace sliding glass door #3 (we haven’t);

Mr. H.C. surprises me by saying, “Let’s do the front of the house.”

He must have read my post a month or so ago, when I listed all the projects that need to occur for the front of the house to look good better. (See post 136.)

New windowsThis is the cottage up until two days ago. (Uhmmm — the way it’s looked for the last two years. Just let me say that the front looks WAY better than the back.) So with the red brick, the faded blue gray cedar shakes, and the white clapboard siding, there was just way too much going on. Sort of a stripey effect, don’t you think?

I’m actually favoring the colors of white, red, and gray; but in a google image search for “white cottage red trim” this is the first image that showed up:

old_kurtz_house
Please pardon me, if this is your house, but it’s not at all what I have in mind for the cottage. Though it does look about like the color of red that is our back porch — Segovia Red — this color right here:

Back porch rails and ceiling, newly painted

Back porch rails and ceiling, newly painted

The back porch color can be seen from both sides of the house as one drives down (or up) the road. So it counts.

I always thought when we did the exterior of the cottage, that we would try to emulate what it looked like in the forties; but we can’t really.

Back then it was white with forties green trim.

The roof was green, now it’s gray, and it will stay that color when we put on the new roof (next year?).

There was not a red back porch.

And there was no brick on the front. I’ve looked at photos of white houses with dark green and red trim, and no, I don’t want a Christmas house.

Here’s what we have now:

apple hill cottage, newly painted

Neither of us are used to seeing it without the gray. Mr. H.C. thinks it might be too much white. I was originally thinking of whitewashing the brick, but now I’m thinking yes, that might be too much white…

The sliding glass doors will be replaced sometime before winter with doors that look something like this:

IMG_6391

There hasn’t been an interactive post on this blog for awhile, so here is your chance:

  1. Should we paint the brick? If so, what color of gray? :-) (Maybe if we paint the doors red, it will tie in the brick color?
  2. What about door colors? Both front doors can be painted. (Keep in mind that the back porch is Segovia Red, and one can see the porch from both sides of the house.)
  3. What do you think about shutters? Mr. H.C. brought that up the other day, just as I had been thinking about them too. But I have an aversion to shutters that don’t fit the windows, and that’s a 3-window series there in the front… I’m thinking more along the lines of flower boxes under those 3 front windows. What do you think — flower boxes or shutters or neither?

I’d like to hear your thoughts, dear readers. Of course, then we’ll do what we want anyway — whatever that might be…

Here are some more shots to get you thinking…