52. Now that we’ve seen the worst…*

We’ve been working on this little cottage every weekend for almost a year now.

We are no longer under any illusions. We know that the wiring is haphazard, the upkeep has been minimal, and it was built in fits and starts without much planning. (This is not to cast aspersions on previous owners and builders — they were our grandfathers and great uncles; they were our fathers and mothers, and we loved them.)

IMG_1366

Checking to see how easy it will be to disconnect the sink faucets and drain…

We thought we were prepared for what we were going to see when we took out the cabinets.

We were wrong. WAY wrong. We were not prepared.

We were both so appalled that I only took one small picture, and that was AFTER we cleaned up the floor of insulation, mouse nests, hickory nuts, dead bugs, a mummified mouse, and an inch of mouse droppings. There was no photo of that, because, quite frankly, I don’t want to remember it.

But that wasn’t the worst.

IMG_1367

Yes, in the picture above those ARE holes in the walls. See how the wall doesn’t appear to meet the floor? It doesn’t!

Yes, in the picture above, you can see mouse-chewed wire through the holes in the wall.

And yes, in the picture above, that IS a hole in the floor. Under the cabinet were three pieces of plywood about 8×12″ just sitting on the joists. Not nailed down. Of course, those boards moved when the cabinet was pulled out and dropped into the crawl space below. Basically, there was not a nailed down floor under the cabinets. We spent seven minutes staring aghast at the ground; we spent three minutes wondering if Gus the groundhog (see post 21. Apple Picking Time. ) would poke his nose into the kitchen; and we spent eighteen minutes scurrying around fixing it temporarily, so we could sleep at night. While I guarded the kitchen from Gus, raccoons, snakes, bears, or any other critter that could possibly make their way up that hole, Mr. H.C. found enough boards to cover the floor for now while we try to figure out what’s next. We are not wimps here; we’ve seen holes in the floor before…

Just one more polite rant: These cabinets were installed by a Professional Cabinet Company. What kind of professional would leave holes in the floors and walls and shrug and say, “Oh just leave it, the cabinets are going there anyway!”???

Right. A cabinet company that is still in business! Admittedly these cabinets were installed 35+years ago; but thirty-five years ago, did they still leave holes in floors? Now, we’ve all seen or heard horror stories of Professional Remodelers who have done irreparable damage to houses. Any stories out there? C’mon, the worst remodel saga you’ve ever seen — in 100 words or less. Let’s hear those stories!

Plans seem to change daily around here… And it’s not usually boring (unless you’re sanding windows…) So we’re off to buy metal lath, plaster, and some floor boards.

Let’s hear those stories…

*Mr. H. C. reminds me that this, very likely, is NOT YET the worst…

49. Ta daaa…..

Those of you who read this blog on a regular or semi-regular basis (I love all of you!) know that we have been working on the kitchen window project for a VERY long time.

There have been posts on looking for replacement windows, posts on sanding windows, posts on priming windows, posts on reglazing windows, there have even been posts philosophizing on windows…

So there’s no need to go over how excruciatingly long and painful the process was. I will just show you a couple of photos and shut up about windows already…

20130218-221146.jpg

Note the beautiful detail behind the center post. Note the shiny, stained dark oak sill.

IMG_1375

Note the lovely new hanging lamp…

IMG_1364

Even Mr. Henry loves the new windowsill...

Even Mr. Henry loves the new windowsill…

I guess I could show you a before picture as well…

IMG_1693

August 2011

48. Not Just Spray Paint: a DIY Oil Rubbed Bronze Finish

The look of oil-rubbed bronze finish on metal is sleek and rustic at the same time; it isn’t black, it isn’t brown. It’s comfortable. All the hardware in the cottage kitchen is a variation of it except the Expensive Kitchen Faucet. (You can read about that here.) We bought the faucet in brushed stainless, mostly because the counter top and sink are going to be soapstone, and we didn’t think a dark faucet would look good on dark soapstone. My decorator sister agreed. She thinks the oil-rubbed bronze finish will date your house in a few years — “Oh, that is SO oughties…” Well, I might give her that — I just hope I’m not around long enough to know. And I’m still thinking of oil-rubbed bronze fixtures in the bathroom…

Brass push plate and handleBut last week Mr. H. C. brought home this wonderful handle for the kitchen door that goes down to the basement. (This is the door that will soon be Blooming Grove Green.) The handle was bright brass with a matching pull plate; a lovely simple design, but absolutely wrong color.

IMG_1300
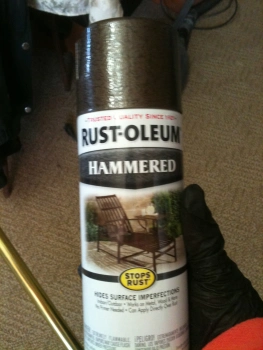
Now, I have spray painted oil-rubbed bronze finish on metal with the best of DIY-ers. I’ve done our cabinet hinges and screws, and I’ve done the light fixtures in the kitchen, and a curtain rod, switchplates, towel holders, door hinges…  But a door handle? That will be used every day? Mr. H. C. said, “So have you ever looked up how to get a real ORB finish? You know, Authentic?”

Apart from electrolyzing or electroplating metal, which I don’t think I am ready for, the best idea I found was from House of Antique Hardware. They sell a brass and bronze aging solution that takes unlaquered brass and gives it a dark old-looking finish much like the oil-rubbed bronze. We ordered a big bottle for around $25. I think we could have gotten away with a small bottle, but I don’t ever want to run out of this stuff!

Instructions specifically say that it only works on unlacquered metal, and I was pretty sure that this door handle was lacquered. It was really shiny. And smooth. So I soaked both the handle and the pull plate in lacquer thinner for about 15 minutes each; then I rubbed them carefully with the finest grade steel wool I could find.

I put on my safety glasses and my gloves – this is a nasty chemical mixture of acids, folks – and found a large plastic container. The instructions say that glass is also acceptable, but don’t use metal – you don’t want the acids to react in the wrong way with your container. Pour enough of the chemical solution in the container to cover the hardware. I did the handle first.

Items for DIY oil rubbed bronze finishing

Everything is pictured here except the safety glasses and the chopstick that I used to push the pieces around in the solution. I had my safety glasses on when I took the photo. AWYSG!

With gloves on, wipe the handle carefully with a clean lint-free cloth. Fingerprints can keep the chemicals from doing their thing on the brass. Then put the handle in the solution and be amazed. It starts to darken almost immediately. You also need a tool of some sort to fish the hardware out of the chemical solution. (I used a chopstick.)

Brass ager solution

I jiggled the handle around a bit so it would darken evenly on all sides; the larger pull plate I actually turned over several times. Leave the piece in the solution until it is a little darker than you want; it lightens with the next step.

Door handel in Oil rubbed bronze

No spray paint here!

Take out your hardware and rinse in cold water. I just used the sink, but you could certainly put a container of cold water next to you and just dunk the hardware into it. The point is to stop the chemical reaction. The water lightens it a bit. When I had done both pieces, then I got out some mineral oil and rubbed it in. That evened up the color and made both pieces a bit darker again.

You can see the shine of the mineral oil in this photo. Now you must control yourself from rushing around trying to find everything you own that is brass or bronze and throwing it in the solution. Pour the solution back in the bottle; it can be reused. I’m certain I will get much use from this bottle; however, this solution does not work on all metals. The little decorative washers that you see in the second photo came out splotchy; I don’t know if they weren’t solid brass, if I didn’t clean them enough, or why. Anyway, I spray painted them, and they look just fine.

This elegant $15 DIY oil-rubbed bronze door handle makes me smile.

*I am amending this post a few weeks later. I tried another brass push plate very similar to the one in the photo, but purchased at a different time and place. I soaked it in lacquer thinner as well. But when I put it in the solution, it was very streaky. Not acceptable. So I rinsed it off, got out the steel wool and went to work. Under a good light, I could tell that the lacquer thinner just had not gotten all the lacquer off. I put in a good 15 minutes of elbow grease and steel wool. The second time I tried it, it came out lovely — just as good as the other one. So don’t be afraid to try it again, if it doesn’t work the first time.

And here it is finished on the  painted door:

green door to the basement

This is how lovely it still looks three years later — this door handle gets touched multiple times every day.