August Eighth. We’ve been
Waiting with impatience for
these ugly beauties.

August Eighth. We’ve been
Waiting with impatience for
these ugly beauties.
This is the first year either of us has ever grown garlic. So it seems kind of silly to do a DIY post on how to grow it, but I’m telling you, if all you’ve ever had is store bought cured garlic? Oh my. There is nothing like fresh garlic — it is mellower, tastier, and just all-round better.

We planted the cloves last fall in mid-October. Fall 2015, was incredibly mild for SW Pennsylvania. We didn’t even have a frost until mid-November (at least up here on our ridge — the valleys got it earlier). So the garlic grew. It was almost six inches tall and overwintered at that height. It made me nervous, and we mulched the plants heavily with straw, just in case. All the experts say not to worry, that garlic will overwinter fine, and it did.
In retrospect, I should have fertilized it more this spring. I added a light top dressing of mushroom manure, but I think I should have been heavier with it, because the outer leaves never did green up. The bottom couple of leaves always had yellow tips.
I planted a pound each of two different varieties of hardneck garlic — Polish White and Siberian — ordered from The Garlic Store. They sell organic seeds and they send your order just about when you should be planting it for your area. I think I should have ordered another pound; two pounds made for four eight-foot rows. I wanted more…
About early June the center stalk (called a scape) starts curling around. I cut them out — everything I read said the bulbs will get bigger if the plant doesn’t have to put energy into producing the scapes. I started poking around in the soil the last week of June, and the bulb I dug up wasn’t quite ready — it didn’t have nicely formed cloves yet, but I used it anyway by pressing chunks through my garlic press.
Turns out I was digging in the wrong section… The two rows of Siberian garlic had a shorter growing season. Yesterday, on July 3rd, I dug most all of those two rows up. They are huge and beautiful. The Polish Whites are not quite ready yet. (The experts say to dig the garlic when the lower third to half of the outer leaves have started to dry and turn brown.)

garlic and onions drying on the back porch
We are drying these beauties on a drying rack on an out-of-the-way spot on the back porch because we had the drying rack and we might as well use it. (It was originally made for onions and winter squash). Most folks braid the garlic and hang it. It is supposed to dry for 3-4 weeks before winter storage. This rack is full with the Siberian garlic, so I’m going to try braiding the next batch when I harvest it in a couple of weeks.
And it would be a sad garlic post without a recipe…
 Ingredients: 6-8 beets
8 unshelled walnuts, or 1/2 c. finely chopped walnuts
1-2 sprigs of fresh rosemary
1 sliced onion
1 head of garlic
olive oil, salt & pepper (This recipe serves 6-8)
Choose a nice large garlic and slice the top of the end off so you can see the cloves inside. Also slice off the back root end if necessary. Peel back as much of the papery skin as you can, so you just have the cloves. Brush the top with olive oil, and wrap in a small piece of foil.


Put in the oven at 400 degrees for approximately 25-30 minutes. While the garlic is roasting, chop the walnuts, dice up the fresh rosemary, and peel the beets and chop them.


When chopping the beets, the key is to keep the pieces uniform in size so they will all be done at the same time.
 When the garlic has five minutes left, put the walnuts in and let them roast with the garlic for the remaining five minutes. The garlic should be aromatic and soft and starting to brown when you open the packets of foil. Let the garlic cool while you slice an onion, and toss the beets and onion with some olive oil and kosher salt. Place on baking sheet and put in the 400 degree oven for 15 minutes.

Chop the walnuts finely. You should have about 1/2 cup.
Using a cocktail fork, separate the garlic cloves and remove the meaty garlic cloves from the skins. Discard the skins and put the cloves in a small bowl and mash them with the fork. Add the chopped rosemary, and mash together. Stir in the chopped walnuts. Add a teaspoon or so of olive oil and a dash of kosher salt.


When the timer rings at 15 minutes, take out the beets and stir them around well. Put them back in the oven for another 15 minutes. When they are fork tender, stir into a serving bowl and toss with the roasted garlic-walnut-rosemary mixture.

Looks like dessert, doesn’t it?
Some people might say this recipe begs for some goat cheese, but it absolutely doesn’t need it. Besides I was going for an all-home-grown side dish; and there are no plans to get a goat. But there are plans to try a pound of another type of garlic for this fall…
You will go out in joy and be led forth in peace;
the mountains and the hills will burst into song before you,
and all the trees of the field will clap their hands. Isaiah 55:12
That’s always been one of my favorite verses — the image of the trees rising up and swaying their branches in joy to the Savior is a powerful one for me. (I always loved Tolkien’s Ents, too.)
But the year of 2016 paints a grim picture of trees cowering in fear from the plague of giant flying periodical cicadas. (Yes, I’m sorry, another post on cicadas. It’s what’s happening here at Apple Hill Cottage.)

This is the oak tree at the side of our house. The oaks seem to be a favorite and sustain the most damage.
The only websites I can find that tell the truth about these creatures are the Penn State and Ohio State agricultural offices. At the bottom of the Penn State article it says, (I’m paraphrasing) Your trees should be fine, that is, unless you have 4-year-old or less fruit trees. Then you’re in big trouble.
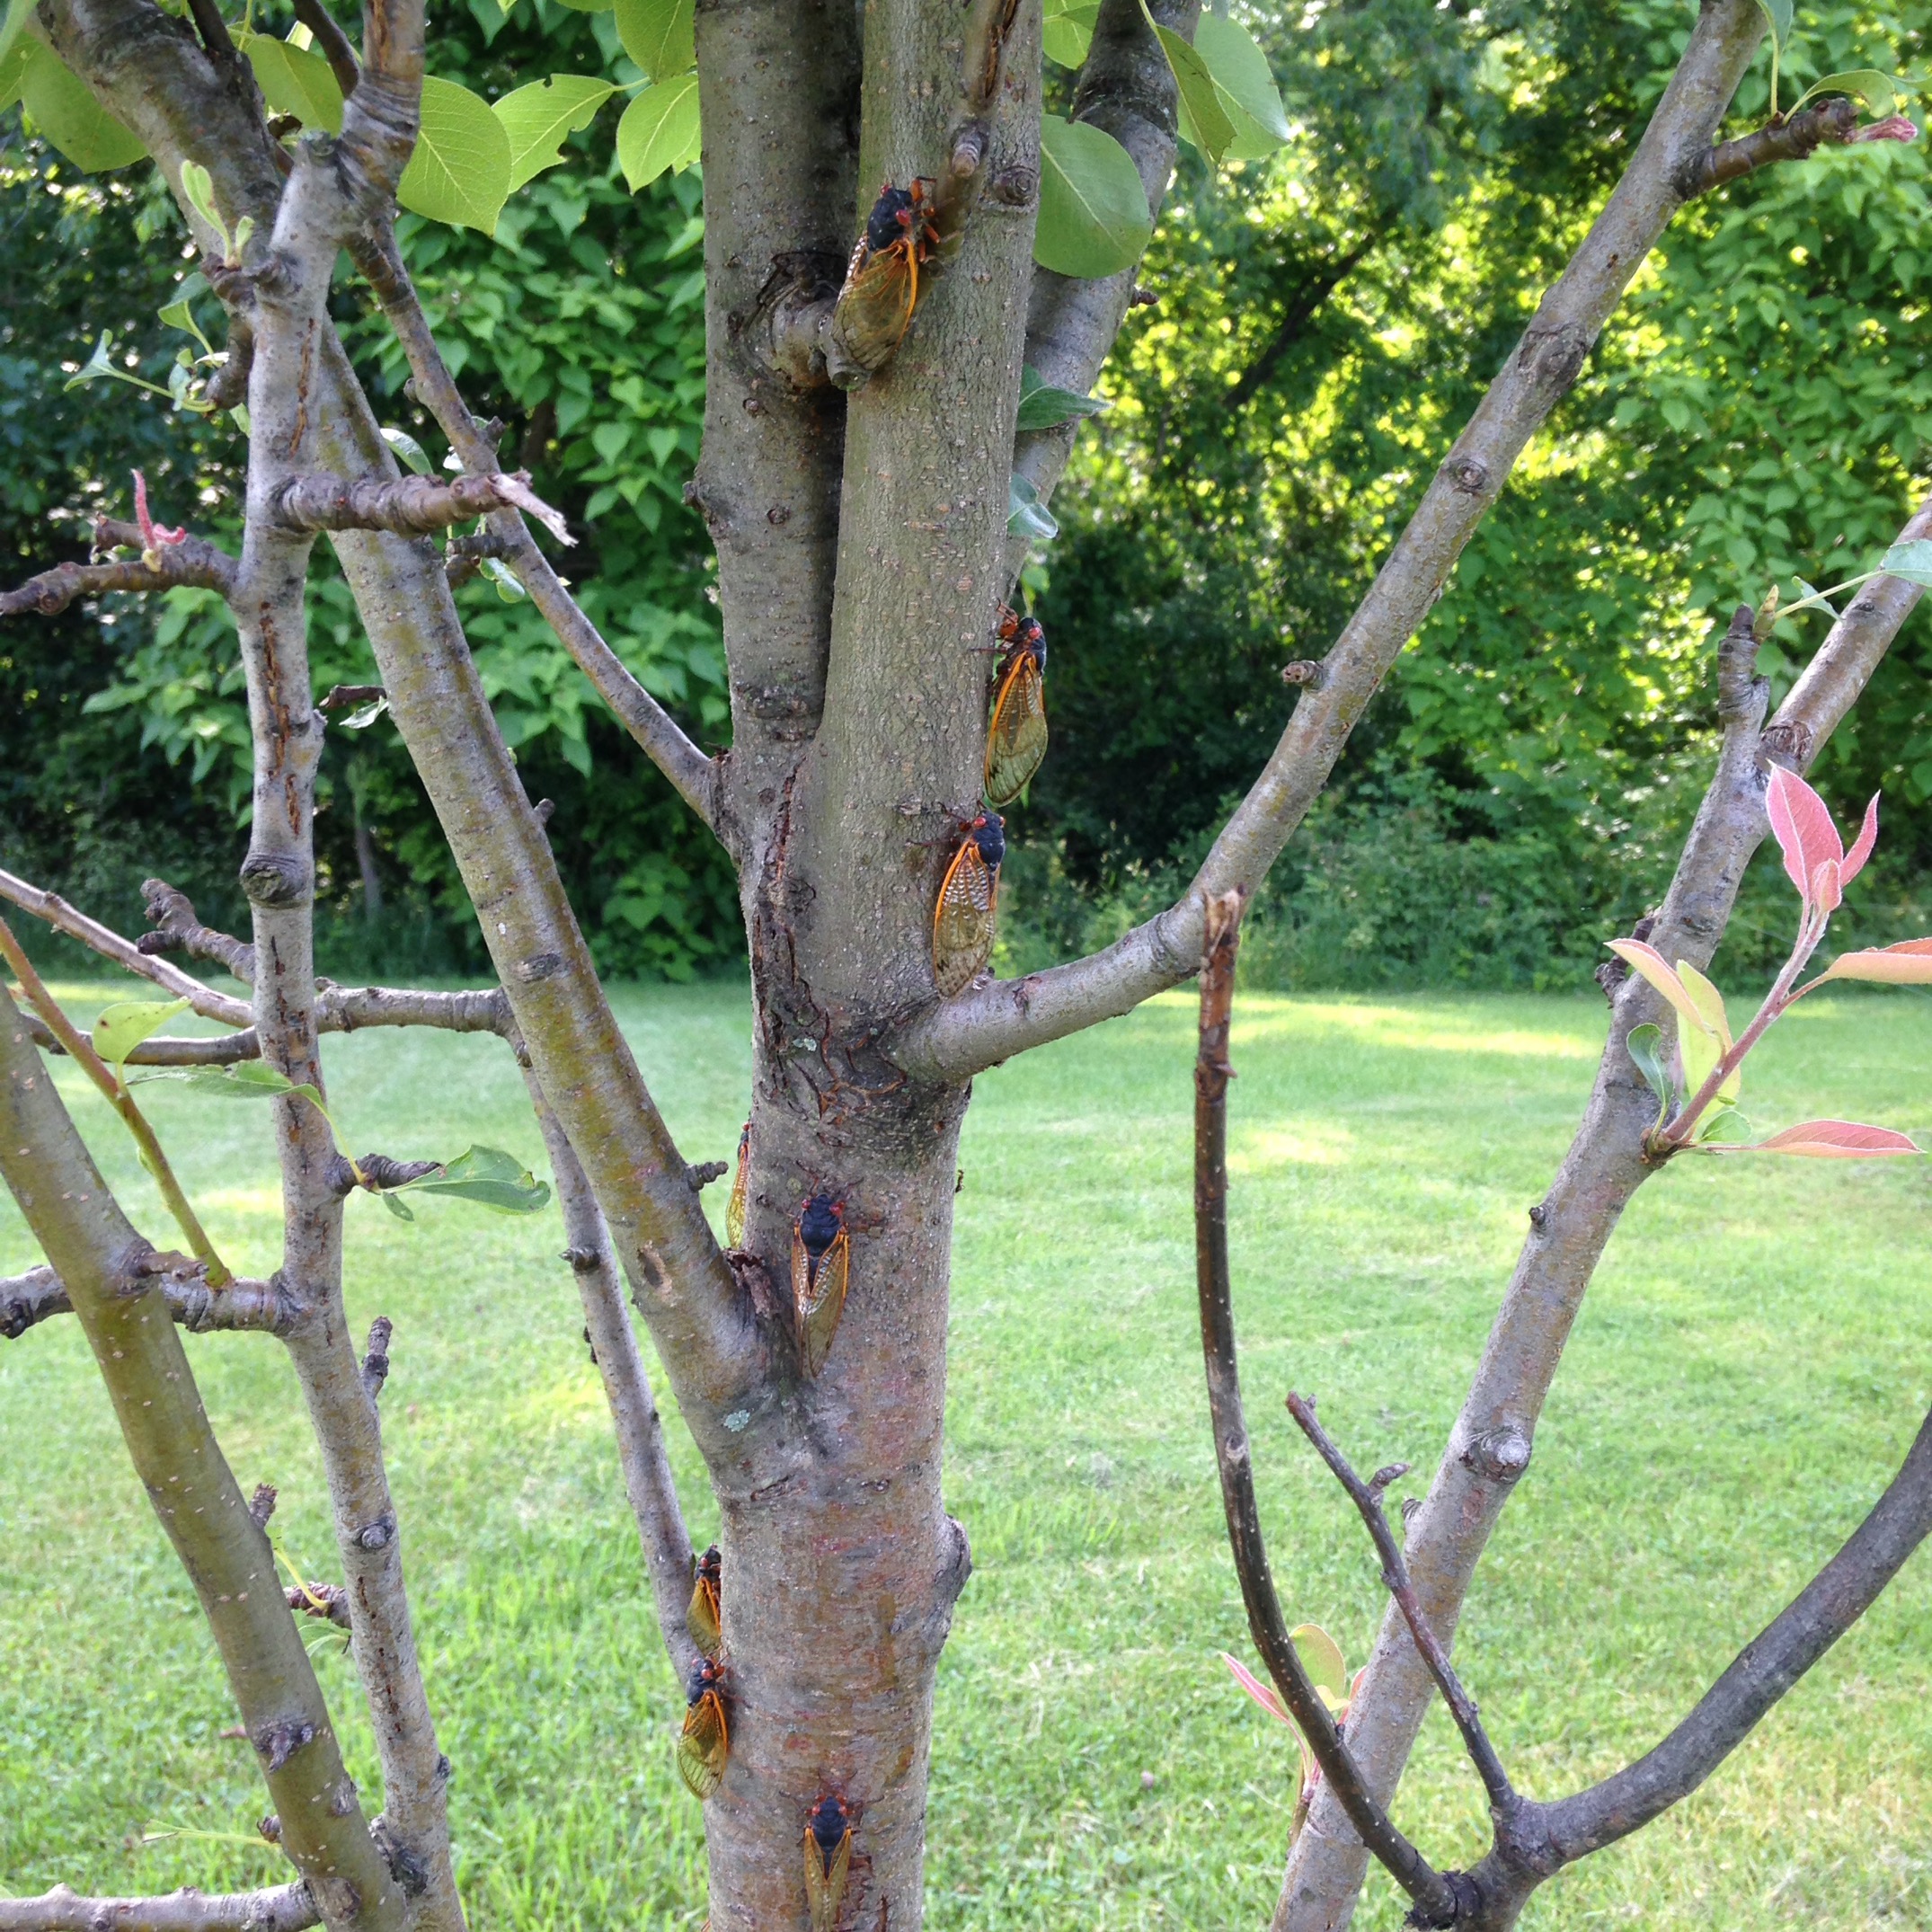
The adult cicadas are gone now. I can go out in the morning and actually hear birds singing. But the damage they have done to the trees is disheartening. Our yard is littered with broken little branches.

The female cicadas lay their eggs in small shoots at the edges of trees. This is a close up of the slits they make.

Each female can lay up to 400 eggs in 40 to 50 different sites. By my unofficial count that’s about a gazillion cicada eggs on our 2.9 acres… So we are gathering up prunings of branches, both fallen and cut from trees, and burning them.
Tonight we undid the netting on the two trees we covered. As of now, it doesn’t seem like our efforts made a difference, but the branches are not done dying… We pruned back the trees by about a third. The apples seem to have been hit the worst; the two pear trees the least; the beautiful little cherry may make it, but will never be as symmetrical as it was this spring before the cicada plague began.


Mr. H. C.’s beloved Honey Crisp tree went from 10 feet tall to 6 feet. We’re just grateful that we were slackers this spring and didn’t do the early spring pruning.
 That pile of branches is from one tree. Note the tree in the far background. No, it isn’t October!
Why did we not know that to plant our fruit trees 3 or 4 years ago was, in effect, dooming them from the 17-year-locusts? Why did we waste money, time, effort, and love on these six beautiful little trees? What? Oh, NEXT YEAR is the year to plant fruit trees because then they will have 17 years to grow and be fruitful before the next horde arrives.

Most people are just delighted that the awful bugs are gone. Everyone has a story about someone they know who was outside doing chores and opened their mouth at the wrong time. It was bonding, living through this plague — there was always something to talk about with strangers in line at the grocery store…
But from everything I’ve read about the life cycle of Magicicada Septendecim, once they hatch in the twigs (after about six weeks) they are the size of grains of rice and they drop to the ground. Really? Cicada maggots the size of rice dropping from trees? I originally thought the dead branches fell with the eggs in them and that’s how the larvae got to the ground. But this quote below is from the OSU Entomology Dept.:
Cicada eggs remain in the twigs for six to ten weeks before hatching. The newly hatched, ant-like nymphs fall to the ground where they burrow six to 18 inches underground to feed.
It definitely implies that the nymphs fall through the air, doesn’t it? There’s something to look forward to in August!
I need a wide-brimmed hat with a veil more than ever…
