I’ve written about the mudroom before. Several times.
The mudroom has issues. Several issues.
Each time we’ve thought to tackle it, one of those issues has stopped us dead.
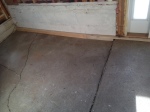
- The floor for instance: Made of two concrete slabs, there’s not much of a foundation (if any). Just see the huge crack down the center. The sinking of the floor made it very un-level — a four inch difference from one side to the other!
- The ceiling for instance: It leaks. Despite spot fixing and new insulation, the ceiling still leaks by the chimney. Mr. H.C. thinks it is the flashing, but the probable truth is
It needs a new roof.
- But we aren’t ready to put on a new roof until we decide some serious architectural issues.
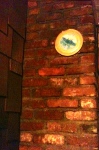
- The chimney for instance: It is old and ugly and needs relining. $$$. We had a company come to give us an estimate — $3000 for just the chimney liner, not counting the stove pipe needed to hook up the wood stove.
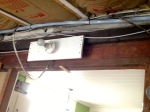
- The walls for instance: There is a floor-to-ceiling electric panel/wiring mess on the kitchen side wall. Not only is it inconvenient to have by the chimney, it is UGLY. And there’s no moving the panel box. (Hiding wires is hard!) The rest of the walls are a mismatched amalgam of siding, cement block, and plywood.
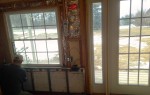
- The whole room for instance: It is the main entrance to the cottage and the door opens into the prevailing winds. Many times the wind just grabs the door from your hands. Did I mention we live on a ridge? It is called Apple Hill, after all. Consequently the whole room is cold; and since it goes directly into our beautiful new kitchen (where we hang out a lot!) it makes the kitchen cold too.
So what’s a pair of rehabbers to do?
Put it off!
Right.
We did that.
Twice.
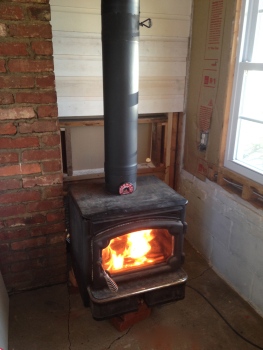 Mr. H.C. was just itching to get the wood stove hooked up into that chimney, but the contractor guy in him couldn’t bear to pay someone else big bucks for something he thought he could do. So we ordered chimney liners online from Woodland Direct for less than half the price and did it ourselves. (Well, Mr. H.C. did it himself, and I just helped guide the stove pipe into the new liner.) And once that old stove got hooked up and we could feel how warm that room was with wonderful wood heat, there was no stopping at the issues.
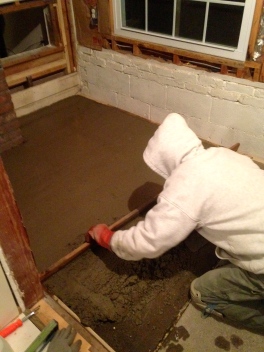 We had planned to put down concrete over concrete to level the floor and then some concrete board over the concrete to keep any cracks from showing up in a couple of years. But the cement board idea didn’t work, so we just laid a new layer of concrete. The laying/grouting/sealing of the tile did not go smoothly; I won’t go into details, but it certainly looks beautiful to us. (Did I mention we chose to do this project during the coldest week of the winter?)
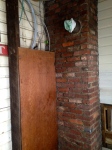
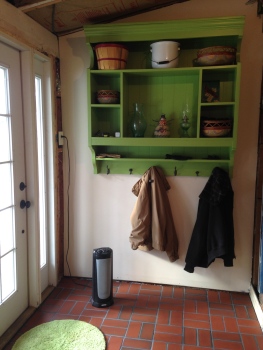 One wall is finished with an old pine hutch top that has been repainted and repurposed into a mudroom staple — shelves and hooks for jackets. I painted it Blooming Grove green to bring the kitchen color out into the adjoining mudroom. The walls behind the wood stove are now covered in metal studs and Hardiebacker board (fire-resistant for the walls next to the wood stove) and some sort of tile will go over it. Soapstone is the material of choice, but $$$ matter. We’ve gone shopping at the big box stores and found nothing of interest, and we’ve had a long dry spell at our favorite Restores.
We have a long way to go still, but we’ve come a long way for a room that had such issues. And I have to show you one more photo series — a shot of the kitchen floor we took up, and why we chose this particular pattern for the mudroom floor.


When I wrote the very first post for Apple Hill Cottage, I talked about trying to respectfully honor those who lived in it before, as well as making it our own.
I think Joe and Clara would approve.

Looks great! Good job! : ) And I love the green color.
LikeLike
It took me months of trying to decide on a color to go in the mostly black and white and wood kitchen. When I found this one, I knew! Thanks. We love it too.
LikeLiked by 1 person
It really pops! Looks beautiful : )
LikeLike
Nicely done. I love the old hutch idea- very clever. Honoring the previous owners is an important part of living in an old house. I remember shortly after we moved into our old house there was a beautiful double rainbow above it. Being only the third family to live in it since it was built in 1865, we took it as a sign of approval.
LikeLike
Rainbows are approval. Absolutely!
I was trying to keep this post from being a thousand word discourse, so I didn’t say that the hutch was actually the top part to my husband’s boyhood desk, where he kept his encyclopedias. It sat on the desk and fell over backward several times. So he changed the bottom part and added a shelf, and I primed and painted. I was afraid it might look like the big green elephant in the room, but we love it.
LikeLiked by 1 person
I have the same flooring on my back porch! Use to include the kitchen but medium blue linoleum (the real stuff) was installed to match the period of my old house. Thanks for sharing the stove pipe link. My 1950 Wedgewood stove needs a stove pipe installed for the broiler. One of the many projects on the back burner.
LikeLike
It’s good you put linoleum (marmoleum?) down — I love the floor, but it just looks like a porch or patio floor to me — not a kitchen.
The Woodland Direct people were great to work with. Mr. H.C. called them at least twice, maybe three times; at least ten big boxes were delivered to our door within a week AND it was free shipping.
Back burner, ha ha, I got it…
LikeLike
Progress! So glad you are back to blogging!
LikeLike
So glad to hear from you! Yes, I’ve had blogging angst…
LikeLike
It looks great! LOVE the look of that hutch for storage! It is always good to be mindful of the history and those who lived in the space before you. We did major renovations to our farmhouse but I sure hope that the love and care we put into our home would make the previous owners proud as well. Love seeing all of your projects!
LikeLike
Yes. And you did those renovations QUICKLY! Sometimes I long for quickly… :-)
Looking forward to your photos…
LikeLike
Nice work! Some more in-progress pictures would be helpful for those trying to do similar things. Hopefully you fixed the flashing first! What flooring did you put under the stove? A huge improvement, nice to see.
LikeLike
Thank you! I do sometimes write DIY posts, but I thought tiling a floor might be too involved. The stove is going to go directly on the terra cotta tile floor; we are going to tile behind the stove with either soapstone or slate. I might consider doing a how-to on that one. I’m married to a construction guy who knows everything, but he doesn’t always like to have his picture taken :-)
Thanks for visiting.
LikeLike