We are chalk painting chairs here at Apple Hill today. But, first, a few disclaimers:
1. I have never used chalk paint before.
2. I am not even a reliable furniture painter — I have had successes and failures — about an equal number of both.
3. I am not known for patience.
Yeah, I’ve been wanting to try chalk paint for the dining room chairs for several months, but I’ve never had $100 to spare on an experiment, that might very well be a failure. See number 2, above.
Enter a few DIY chalk paint recipes that just call for latex paint and plaster of paris. Hmm…. I could do that. But what about the wax? I had done a bit of research and discovered that mostly what gives people problems with the chalk paint technique is doing the wax; I also read quite a few articles that said regular paste wax was perfectly acceptable and had a better learning curve. But I wanted to do the dark wax because I love that streaky, antiqued look. One day as I was searching, I came across a page that suggested using dark shoe polish — the paste kind in the tins — as a substitute for dark wax. Ah ha. The cheapskate wins again! Unfortunately, when I went back to try to read it again, I couldn’t find it anywhere… (The joys of the internet.)
So, if you’ve read this far, you will note that there are about 397 disclaimers in the above few paragraphs.
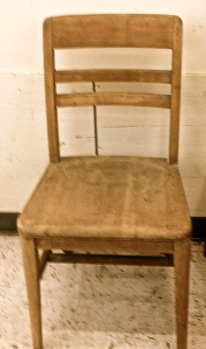
Vintage chairs at St. Vincent de Paul’s for $6.99 each.
What really jump-started this project was the discovery of two chairs at St. Vinnie’s for $6.99 each. One of the chairs had been sanded; the other one they gave up on and left as is. They probably sat around in someone’s basement for a few years as an unfinished project before they were donated to the the thrift shop. (Not that I would know anything about that.)
As I was dusting them, I found a little circle tag that labeled them as Gunlocke Chairs. This company could have an entire post by itself, (President Kennedy’s office chair was a Gunlocke…) and the trademark dated the chairs for us — sometime between 1940 and 1970. There are some Gunlocke chairs on for sale E-Bay for quite a lot of money, but I don’t think painting these chairs will make them go down in value much.
 Cheap DIY stuff and cheap chairs make for a do-it-now project. The only thing lost if it doesn’t work is TIME. I gathered my waxes, cheesecloth, a chip brush, paint, plaster of paris, and sandpaper. Now, this post is going to tell you what all the other DIY chalk paint posts don’t tell you. From a complete newbie who is not on anyone’s payroll, and whose husband (a professional painter, carpenter, and general construction guy) kept shaking his head and nay-saying the whole time. (Fact: I am generally not a rule-follower. Fact: Mr. H.C. IS a rule-follower. That’s why his projects always look so good and mine don’t always.)
PAINTING
Throughout blogdom you can read that the best part of chalk painting is that you don’t have to do any prep work. Just paint over any finish on the piece, and ta da… No sanding, no priming. In fact, the high price of the stuff is justified by saying you don’t have to buy primer. So hear me now — unless your piece is perfect, you have to sand. Yes, the chalk paint is thick, but it doesn’t cover over nicks, scrapes, gouges or peeling paint. If you have a spot where paint has peeled off, it is going to show. Unless maybe you do five coats. Or maybe the expensive chalk paint covers better. I can’t say about that.
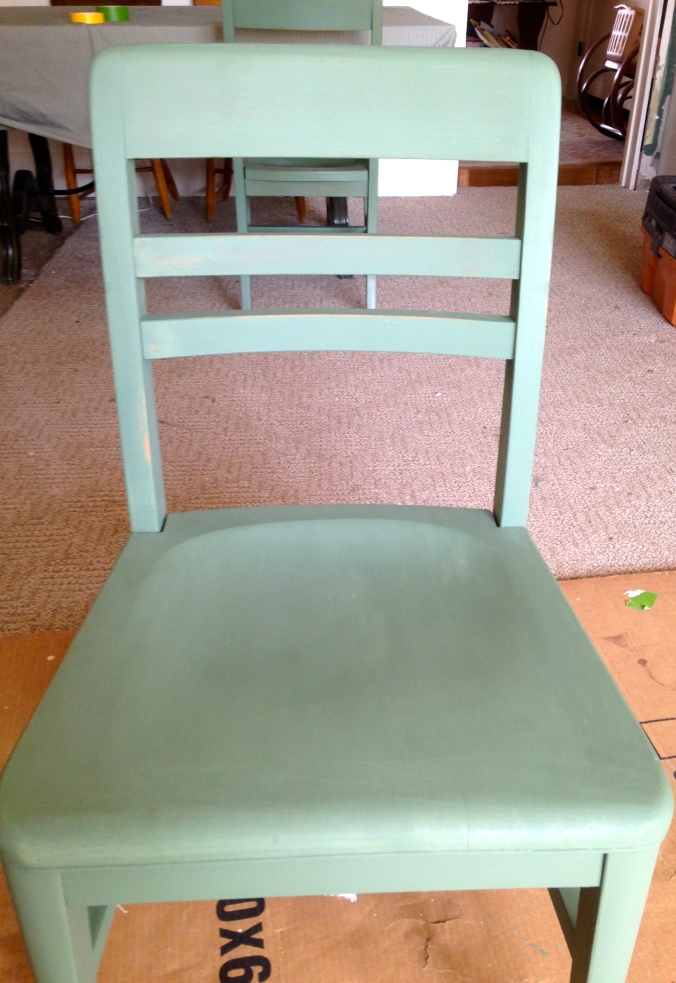
Chalk-painted chair with 2 coats of paint and a little sanding.
Secondly, the chalk paint is really thick. It has plaster of paris in it! So you have to keep stirring. Hold your brush in one hand and stir with the other. Now keep in mind, this is the DIY stuff. I got interrupted after painting one chair and didn’t go back for an hour or so. The paint was very thick and when I tried to stir it, I got lumps because it hadn’t been constantly stirred. I put three coats on the first chair, but because the paint was drying and lumping in the container, I only got two coats on the second chair. I would have preferred three coats. Yes, it dries that fast.
Third, yes, it dries that fast. The posts on the expensive chalk paint assure us that we can save it, and just add water if it thickens. Perhaps that is true; I’d sure hate to spend $$$ on a quart of paint, use just a little and have to throw it out. There was no way I could keep the paint I mixed up. By the time I put the second coat on the second chair, it was lumpy (see above) and so thick I ended up just chucking the whole rest of the mix in the trash.
Fourth, because it is so thick one has to be extra careful with painting edges and using a smooth stroke. Edge runs can be sanded off, true, and then you have a distressed piece. But if you weren’t planning on distressing your piece, you might want to think again about using this type of paint. I was careful, and I still had many, many edge runs and blobs. And I could make a lot of bad puns about distressed furniture and distressed painters of furniture, but I will save you from that pain. Just let me say that you should probably plan on sanding off a lot of the edges and letting the underneath show through. That wasn’t a problem for me, because that is what I’d planned on doing.

The recipes I found were all similar. (Salvaged Inspirations, lists four different recipes and compares which worked best.) The recipe I used was 1/2 c. plaster of paris mixed with an equal amount of cold water. Then I added 1 1/2 c. latex paint and stirred well. Emily Fazio wrote an article on the DIY Blog Network using this recipe, although she specified mixing the plaster of paris with warm water. Everything else I read — even the instructions on the PoP carton called for cold water. So I used cold water. Maybe next time I’ll try the hot water to compare.
The paint went on nicely. You can see brushstrokes though, so expect that. The second coat covers better. The third coat looks even better. It dries quickly — did I say that already? One can sand off lumps and runs and distress the edges almost immediately. I used a 150 grit sanding block at first and that seemed too coarse. Mr H.C then went to get me a finer grit — 320 — and that worked well. It distressed the edges without taking too much paint off the rest of the chair. Wipe the chair clean when it is the way you like it, and you are ready to wax. (I have heard that you can also sand after the first coat of wax, but why would you? You can tell what your piece will look like — the wax doesn’t do anything but make it shiny and give it a hard finish. Gums up your sandpaper too…)
WAXING
The number one rule for waxing is not to put on too much at one time. Many light coats are the goal. Most of the articles I read suggested cheese cloth. The brand name chalk paints sell big expensive round brushes with long handles for the wax; I could not find one in any store. I ended up getting a chip brush (natural bristle) and a separate brush for the dark shoe polish that is a brush for putting polish on shoes. (You can usually find them being sold right next to the shoe polish.)
 For applying the wax, the instructions call for a small amount of wax on the cloth, folding over the cloth, and rubbing it on through the folded over cheesecloth.
I didn’t care for putting the wax on with cheesecloth. Maybe it is because I’d never done it before, but I ended up putting on the wax, and rubbing it off again because I couldn’t see where I’d applied the wax. The chip brush worked much better — I could see the wax, and the shape of the brush prevented me from getting too much wax on it.
I found instructions that said to leave the wax on for anywhere from 15 minutes to 4 hours, then buff it with a clean cloth. I tried both 15 minutes and 2 hours before I started to buff the wax, and honestly? I couldn’t tell a difference — perhaps it was just a little harder to buff after the longer time. Here is where I used the cheesecloth — buffing the wax. Fold and refold it, and then get a new piece when it gets covered with the wax you are taking off.
This is the rewarding part. You are working hard, and the chair starts to look beautiful. However, don’t expect the wax to cover blobs or brush strokes because it doesn’t. It is a finish that looks hand done. If that’s what you like, good. If you want a smooth, professional looking “just-bought-it-home-from-the-furniture-store look” then try something else.
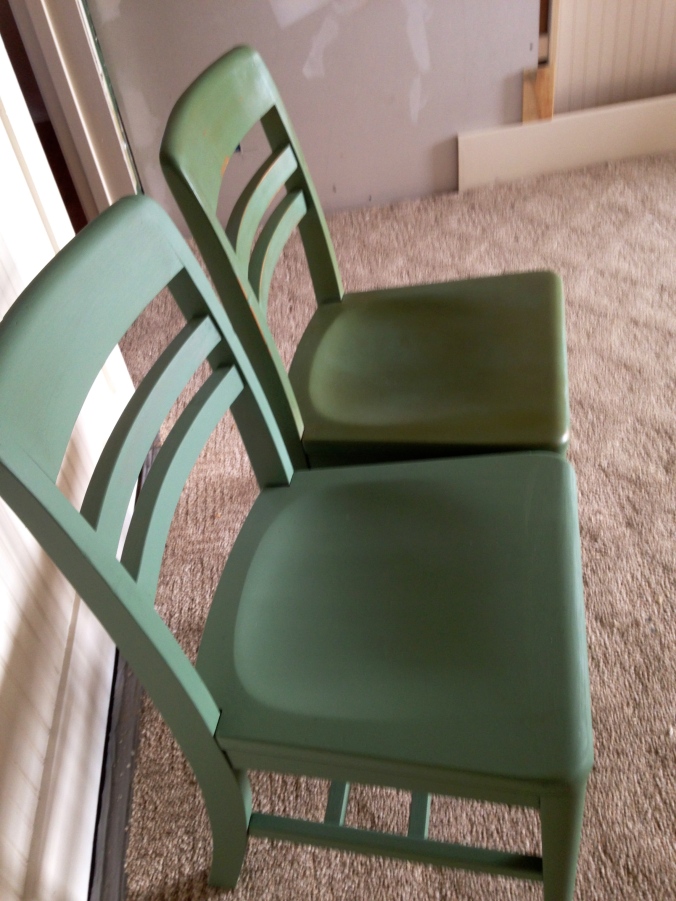
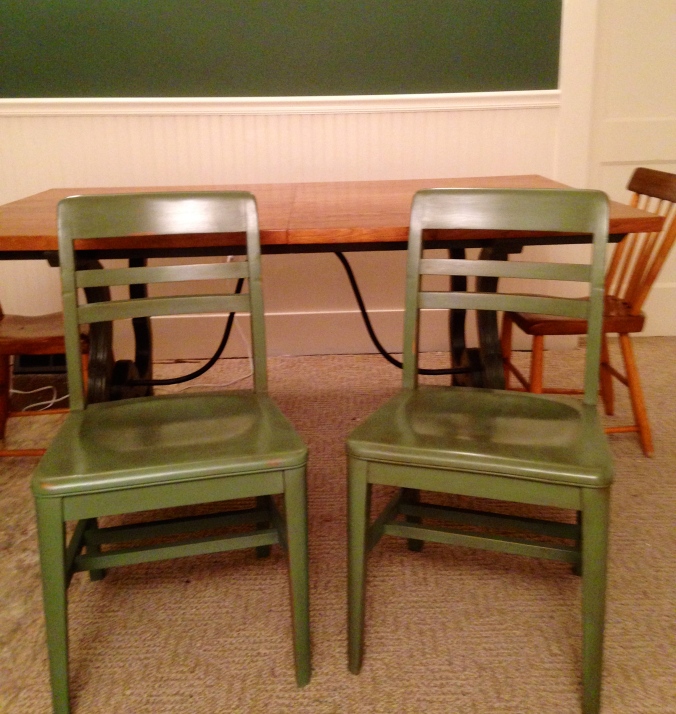
The far chair has been sanded and had a coat of regular wax and a coat of dark wax. The other chair has only been painted (two coats).
ADDING DARK WAX
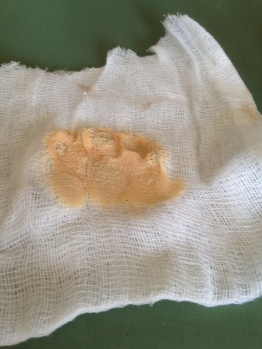
The dark wax is the most fun. Although I must say I didn’t use official dark wax, I used SHOE POLISH! Mr. H.C. was totally worried about this. He didn’t want to sit down in his good white pants and get a dark stain on the seat of his pants. He didn’t think shoe polish would be permanent enough to sit on. Heck, he was even skeptical about the clear wax rubbing off on clothes.
I tried to look up the ingredients of the shoe polish and the ingredients in dark wax, but it just took too long to find incomplete answers, so I gave up. Here is what I did discover: Dark wax isn’t easy to come by. Neither Lowe’s nor Home Depot stock it, although you can special order it from both places. Many hardware stores carry the clear paste wax, but the dark? Not so much. You can buy Minwax special dark wax on Amazon for $14.17 + shipping. SC Johnson makes a paste wax for wood, and guess who makes the famous Kiwi Shoe Polish? SC Johnson. It worked for me.
Dark wax changes the color. Try it on a sample or an inconspicuous area first. I knew that I wanted the darker color, and I planned for that when I mixed the paint. That is one great point for the chalk painting technique: it is flexible. You can add color, take away color, sand, wax, dark wax, embellish with metallics — and the list goes on.
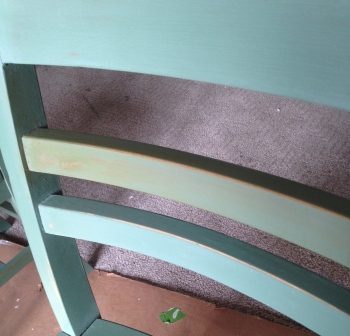
Dark wax on one rung of the chair…
Adding the shoe polish was different from the paste wax. (By the way, all instructions and posts that I read say to always do a coat of clear wax first, otherwise the dark stuff will be really dark and not look the way you pictured it.) Work on a small section at a time, using a smallish brush. Either go with the grain, or in a circular motion. Then wipe it off with a piece of cheesecloth almost immediately. I found that I was a little heavier with the dark wax on the second chair, so later I went back and added more dark wax to the first one, so the colors would be closer. Again, this is part of the nice flexibility of chalk painting.
I let the first chair sit for a week and when we came back, we did the white glove test on the seat of the chair. A little tan, waxy film came off on the cloth. So I did the second chair with the shoe polish, and then I coated them both with two more coats of clear wax, just to be on the safe side. The clear paste wax can says that it doesn’t dry for scrubbing and cleaning for up to thirty days, but the chairs seemed dry and fine for sitting on after twelve hours. How do they look?
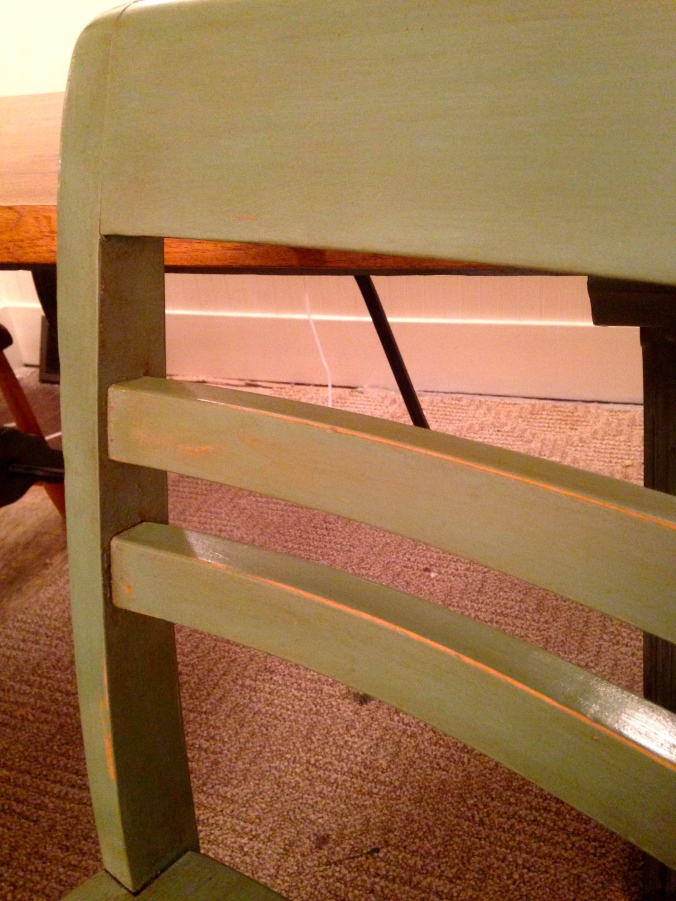
These chairs have two coats of paint and four coats of wax. (One chair got three coats of paint, but honestly, I can’t tell which one it was, now that they are both finished.
Final comments?
I’m glad I didn’t spend the money for the expensive chalk paint for these cheap chairs. They were a perfect small experimental project. If I had a big expensive piece that I was doing, well, I might splurge. I would guess the expensive paint has additives to keep it from drying and lumping so fast. The other point is that I had specific paint I wanted the chairs to go with — the wall next to them. I wanted them to be just a couple of shades lighter — with the commercial chalk paint you go with their colors. They have beautiful colors for sure, but this was just one more reason I tried the DIY stuff first. And for the next project I’m probably going to fork out the $15 for the dark wax from Amazon. Just to compare. Although it does tickle me that the shoe polish seemed to work just fine and it was about $5 (counting the brush.) I like how they turned out, although there were a couple of distressing moments — sorry I had to say that. They aren’t perfect, but they are good enough for me, the recovering perfectionist…

Love the look!
LikeLike
Thanks! I’m happy with them. I’m thinking the goal is to have 4 pairs of chairs, each pair painted a different shade of green…
LikeLike
Beautiful! I loved your descriptions.
LikeLike
You mean like edge runs and little blobs? :-)
LikeLike